ngx_http_fastcgi_module
对于一些动态资源,我们常用的做法就是通过fastcgi协议反代到后端的支持fastcgi协议的程序运行,例如php-fpm,nginx通过ngx_http_fastcgi_module模块使nginx支持fastcgi协议。ngx_http_fastcgi_module模块使用方法和指令格式都和ngx_http_proxy_module差不多。
另外通过fastcgi反代时,应该配置好传递给后端服务器的参数,在nginx的配置目录下有一个文件:fastcgi_params。这个文件定义了默认传递给后端服务器的参数列表,在使用fastcgi_pass反代时,应该注意把默认参数include进来,以免发生错误。
常用指令
fastcgi_pass
Syntax: fastcgi_pass address;
Default:    —
Context:    location, if in location
设置FastCGI服务器的地址。地址可以指定为一个域名或IP地址,还可以指定端口
例如:
fastcgi_index name
fastcgi默认的主页资源;
fastcgi_param
Syntax: fastcgi_param parameter value [if_not_empty];
Default:    —
Context:    http, server, location
设置一个应该传递给FastCGI服务器的参数。这个值可以包含文本、变量和它们的组合。
配置示例:
前提:配置好fpm server和mariadb-server服务;
location ~* \.php$ {
    root           /usr/share/nginx/html;
    fastcgi_pass   10.1.1.11:9000;
    fastcgi_index  index.php;
    fastcgi_param  SCRIPT_FILENAME  /usr/share/nginx/html$fastcgi_script_name;
    include        fastcgi_params;
}
fastcgi_cache_path
Syntax: fastcgi_cache_path path [levels=levels] [use_temp_path=on|off] keys_zone=name:size [inactive=time] [max_size=size] [manager_files=number] [manager_sleep=time] [manager_threshold=time] [loader_files=number] [loader_sleep=time] [loader_threshold=time] [purger=on|off] [purger_files=number] [purger_sleep=time] [purger_threshold=time];
Default:    —
Context:    http
定义fastcgi的缓存;缓存位置为磁盘上的文件系统,由path所指定路径来定义;
levels=levels:缓存目录的层级数量,以及每一级的目录数量;
keys_zone=name:size k/v映射的内存空间的名称及大小
inactive=time 非活动时长
max_size=size 磁盘上用于缓存数据的缓存空间上限
fastcgi_cache
调用指定的缓存空间来缓存数据,配合上面的指令使用。
fastcgi_cache_valid
不同的响应码各自的缓存时长;
fastcgi_cache_key
定义缓存以什么充当键
fastcgi_cache_methods
定义以什么请求方法时,使用缓存。
fastcgi_cache_min_uses
缓存空间中的缓存项在inactive定义的非活动时间内至少要被访问到此处所指定的次数方可被认作活动项;
inactive时间在fastcgi_cache_path中定义
实验:动态和静态资源分离
配置proxy服务器,把静态资源反代给10.1.1.11,动态资源则反代给10.1.1.12
配置PHP-FPM
安装php等组件
[root@node2 ~]# yum -y install php-fpm php-mysql php-mcrypt php-mbstring
配置php-fpm
[root@node2 ~]# vim /etc/php-fpm.d/www.conf

listen = 0.0.0.0:9000   #简体端口
listen.allowed_clients = 10.1.1.99  #允许处理谁的请求
user = nginx    #允许pfp-fpm的用户
group = nginx

pm.status_path = /status    #查看pfp-fpm的动态
ping.path = /ping   #ping检测
ping.response = pong    #如果服务正常则回应pong
php_value[session.save_handler] = files
php_value[session.save_path] = /var/lib/php/session
创建session文件夹并设置权限
[root@node2 pam]# mkdir /var/lib/php/session #创建session文件夹
[root@node2 pam]# chown nginx:nginx /var/lib/php/session


[root@node2 ~]# systemctl restart php-fpm  #启动php-fpm

[root@node2 ~]# ss -tan     #成功监听9000端口
State      Recv-Q Send-Q     Local Address:Port                    Peer Address:Port
LISTEN     0      128                    *:9000                               *:*
php-fpm在上面的配置中开启了ping检测,我们可以在proxy服务器上,对URL进行设置,
[root@nginx_proxy ~]# vim /etc/nginx/conf.d/proxy.conf

server {
        listen 80;
        server_name www.ilinux.io;

        location / {
        proxy_pass http://10.1.1.11;
        }

    location  ~* ^/(status|ping)$ {
        fastcgi_pass 10.1.1.12:9000;    #反代到后端
        include /etc/nginx/fastcgi_params;  #把要传递的参数列表包含进来,传递给后端
        fastcgi_param SCRIPT_FILENAME $fastcgi_script_name; #后端要执行的脚本名称,可以不写,fastcgi_params文件中有默认参数
        }


}
配置MYSQL数据库
安装数据库
[root@node1 ~]# yum install mariadb-server
修改常用配置并启动数据库
[root@node1 ~]# vim /etc/my.cnf.d/server.cnf
[server]
skip_name_resolve=ON
innodb_file_per_table=ON

[root@node1 ~]# systemctl start mariadb
初始化数据库
[root@node1 ~]# mysql_secure_installation
Set root password? [Y/n] y
New password:
Re-enter new password:
Password updated successfully!
Reloading privilege tables..
 ... Success!

Remove anonymous users? [Y/n] y
 ... Success!

Disallow root login remotely? [Y/n] n
 ... skipping.

Remove test database and access to it? [Y/n] y
 - Dropping test database...
 ... Success!
 - Removing privileges on test database...
 ... Success!

Reload privilege tables now? [Y/n]
 ... Success!

Thanks for using MariaDB!
创建一个数据库
[root@node1 ~]# mysql -uroot -p

MariaDB [(none)]> CREATE DATABASE test;
Query OK, 1 row affected (0.00 sec)

MariaDB [(none)]> GRANT ALL ON test.* TO 'testuser'@'10.1.1.%' IDENTIFIED BY '523569';
Query OK, 0 rows affected (0.00 sec)

MariaDB [(none)]> FLUSH PRIVILEGES;
Query OK, 0 rows affected (0.00 sec)
接下来,把wordpress放到10.1.1.12服务器上
先创建一个目录,把PHP脚本文件放在该目录中
[root@node2 ~]# mkdir -pv /data/web/html
mkdir: 已创建目录 "/data"
mkdir: 已创建目录 "/data/web"
mkdir: 已创建目录 "/data/web/html"

[root@node2 pam]# chown -R nginx:nginx /data #设置属组属主

[root@node2 html]# tar -xvf wordpress-4.9.4-zh_CN.tar.gz #解压
[root@node2 html]# ln -sv wordpress blog    #创建软连接
[root@node2 wordpress]# chown -R nginx:nginx wordpress
设置反代服务器
server {
        listen 80;
        server_name www.ilinux.io;

        location / {
        proxy_pass http://10.1.1.11;
        }
        location ~* \.php$ {
        include /etc/nginx/fastcgi_params;
        fastcgi_param SCPIRT_FILENAME /data/web/html$fastcgi_script_name #这里要给出URI的PHP脚本路径,这样后端服务器才能找出对应的脚本,也要注意URI已经给出“/”,所以在定义路径时候,末尾不用加
        fastcgi_pass 10.1.1.12:9000;
        }
        location  ~* ^/(status|ping)$ {
        fastcgi_pass 10.1.1.12:9000;
        include /etc/nginx/fastcgi_params;
        fastcgi_param SCRIPT_FILENAME $fastcgi_script_name;
        }

}
~
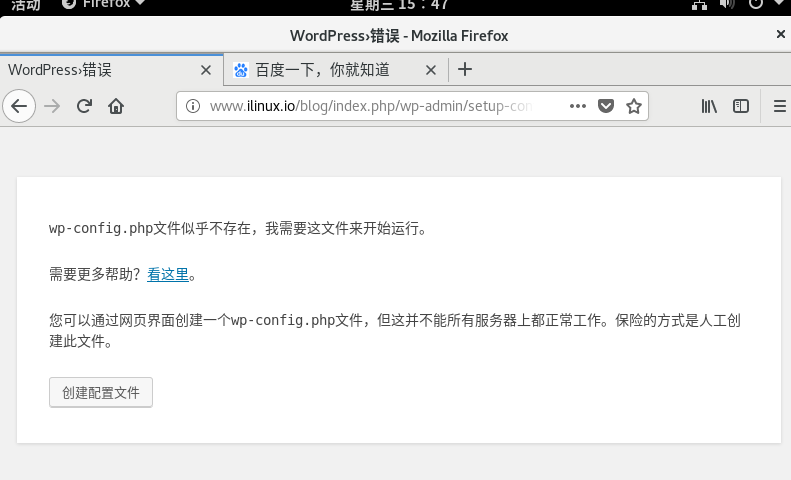
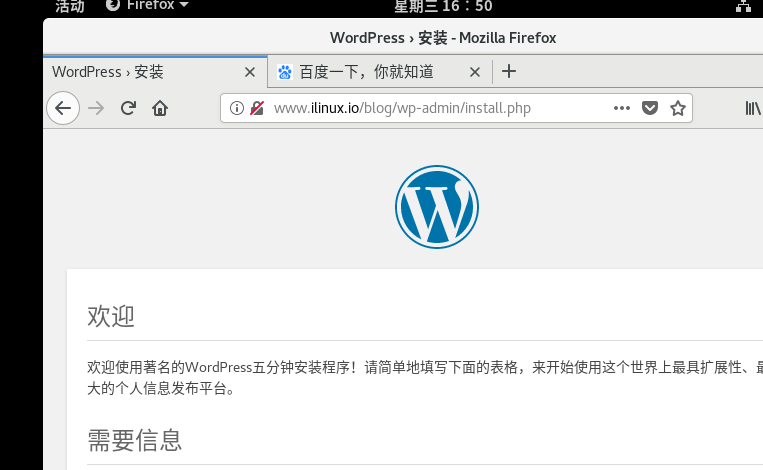
在客户端测试,但图片等静态资源并不能显示,因为其他资源都反代到10.1.1.11了,而这台服务器并没有静态资源,所以接下来,在10.1.1.11上添加静态资源

上传文件到静态资源服务器
[root@node1 nginx]# tar -xvf wordpress-4.9.4-zh_CN.tar.gz #解压

[root@node1 nginx]# ln -sv /usr/share/nginx/wordpress html/blog
"html/blog" -> "/usr/share/nginx/wordpress"

[root@node1 wordpress]# chown -R nginx:nginx wordpress
当把静态资源上传到10.1.1.11时,再次访问,图片等静态资源就出来了。

配置静态资源缓存
在proxy上配置静态资源缓存,上面已经把动态和静态的资源分开了,所以对于一些静态资源,可以把它缓存在proxy服务器上。
定义缓存路径
proxy_cache_path /data/web/nginx/cache levels=1:2 keys_zone=cache_one:10m max_size=1g;
在location中启用该缓存
server {
        listen 80;
        server_name www.ilinux.io;

        location / {
        proxy_pass http://10.1.1.11;
        proxy_cache cache_one;
        proxy_cache_valid 200 302 301 1h;
        proxy_cache_valid any 5m;
        }
